一,新建一个html项目
1,在想存储html网页的地方创建一个文件夹,从vsc打开该文件夹,在该文件栏新建html文件

命名为index.html
二,创建html文件基本框架
<!DOCTYPE html>
<html>
<head>
<meta charset="utf-8">
<title>登陆页面</title>
</head>
<body>
 <p>hello world!</p>
</body>
</html>
可以使用快捷键,键盘 !+enter
三,制作整体框架
<!DOCTYPE html>
<html lang="en">
<head>
<meta charset="UTF-8">
<meta name="viewport" content="width=device-width, initial-scale=1.0">
<link rel="stylesheet" href="./login.CSS">
<title>登陆界面</title>
</head>
<body>
<div class="box">
<div class="login-form">
<div class="title-box">
<h1>登录</h1>
</div>
<div class="logoContainer">
<img src="./1.jpg" alt="头像" class="logo">
</div>
<div class="input-box">
<form action="1.html" method="get">
<span>
<strong>用户名:</strong>
<input type="text" placeholder="请输入用户名" required><!--required是用于提醒用户必须填写该信息-->
</span>
<br>
<span>
<strong>密   码:</strong>
<input type="password" placeholder="请输入密码"required>
</span><br>
<button type="submit">登录</button>
</form>
</div>
</div>
</div>
</body>
</html>
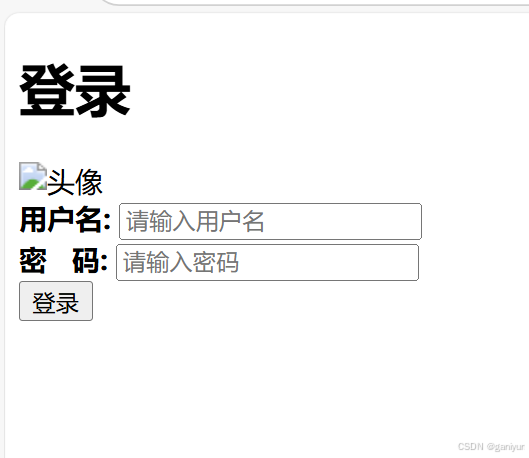
效果如下

一,在原来的文件栏创建一个login.css
代码如下
*{
  margin:0;/*将元素的外边距设置为零*/
  padding: 15px;/*元素内容与其边框之间的空间*/
  box-sizing: border-box;/*用于控制元素的盒模型行为*/
 }
div{/*去掉div之间的间隔*/
   margin: 0;/* 会移除元素外部的空白*/
   padding: 0%;/*会移除元素内部的空白,确保内容与边框直接接触*/
}
 body{
    background-image:url(./4.png);
    background-repeat: no-repeat;/*不重复*/
    overflow: hidden;/*溢出隐藏*/
    background-size:cover ;/*界面覆盖*/
    height: 95vh;/*设置液面高度为视口高度*/
 }
 .box{
    width: 900px;
    height: 600px;
    display: flex;/*给盒子来个flex布局*/
    background-color: rgba(69, 38, 59, 0.5);/*面板颜色,透明度设置*/
    margin: 100px auto;/*上下边框距150px,左右自动居中*/
    border-radius: 25px;/*来个圆角*/
    border: 1px solid rgba(255, 255,255, 0.8);/*加个边框*/
    box-shadow: 0 0 17px #333;/*来个阴影*/
 }


 .title-box h1{
   font-size: 50px;
    margin:0;/*去掉默认外边距*/
    line-height: 3;/*调整行高*/
    margin-bottom: 0;/*控制一个元素与其下方相邻元素之间的间距*/
    letter-spacing: 150px;/*行间字距*/
    background: linear-gradient(90deg,rgb(255, 255, 255),rgb(18, 18, 255));/*渐变背景*/
    -webkit-background-clip: text;/*背景裁剪为文本*/
    -webkit-text-fill-color: transparent;/*文本填充为透明*/
    margin-left: 300px;
 }
 .input-box{
   color: rgb(156, 202, 243);
    font-size: 20px;
    display: flex;
    margin-left: 200px;
    position: relative;
 }
 input{
    height: 40px;
    margin-bottom: 30px;
    font-size: 20px;
    text-indent:2px;/*间隙*/
    border: 2px solid #89c2ee;/*边框*/
    background-color: rgba(97, 26, 78, 0.5);
    border-radius: 4px;

 }
 input:hover{
   transform: scale(1.1);/*鼠标悬停后scale函数和transform使输入框等比例放大*/
 }

.login-form{/*将账号密码登录按钮设为居中*/
   text-align: center;
}
button{
   color:rgb(167, 167, 218);
   width: 200px;
   background:none;
   font-size: 35px;
   margin-left: 50px;
   letter-spacing: 10px;
   border: 0;/*取消边框*/
}
button:hover{
   transform: scale(1.1);
}
button:hover::after,
button:hover::before{
   width: 100%;/*鼠标悬浮时宽度为100%*/
}
button::after,button::before{/*用befor和after伪元素设置两个边框*/
   content: "";/*内容为空*/
   display: block;/*设置为块元素,独占一行*/
   width: 0%;/*设置初始宽度为0*/
   height: 3px;
   background: rgb(209, 56, 194);/*设置背景色*/
   transition: 0.4s;
}
button::before{
   margin-left: auto;/*左侧随宽度自适应*/
}
.logoContainer{
   margin-left: 160px;
   overflow: hidden;/*确保圆角有效*/
}
.logoContainer img{
  margin-bottom: 30px;
}
.logo {
  border-radius: 20%;
  transition: transform 0.7s;/*添加过渡效果*/
}
.logo:hover{
   transform: rotate(360deg);/*鼠标停滞时旋转360度*/
   border-radius: 50%;/*鼠标悬停时保持圆形*/
}
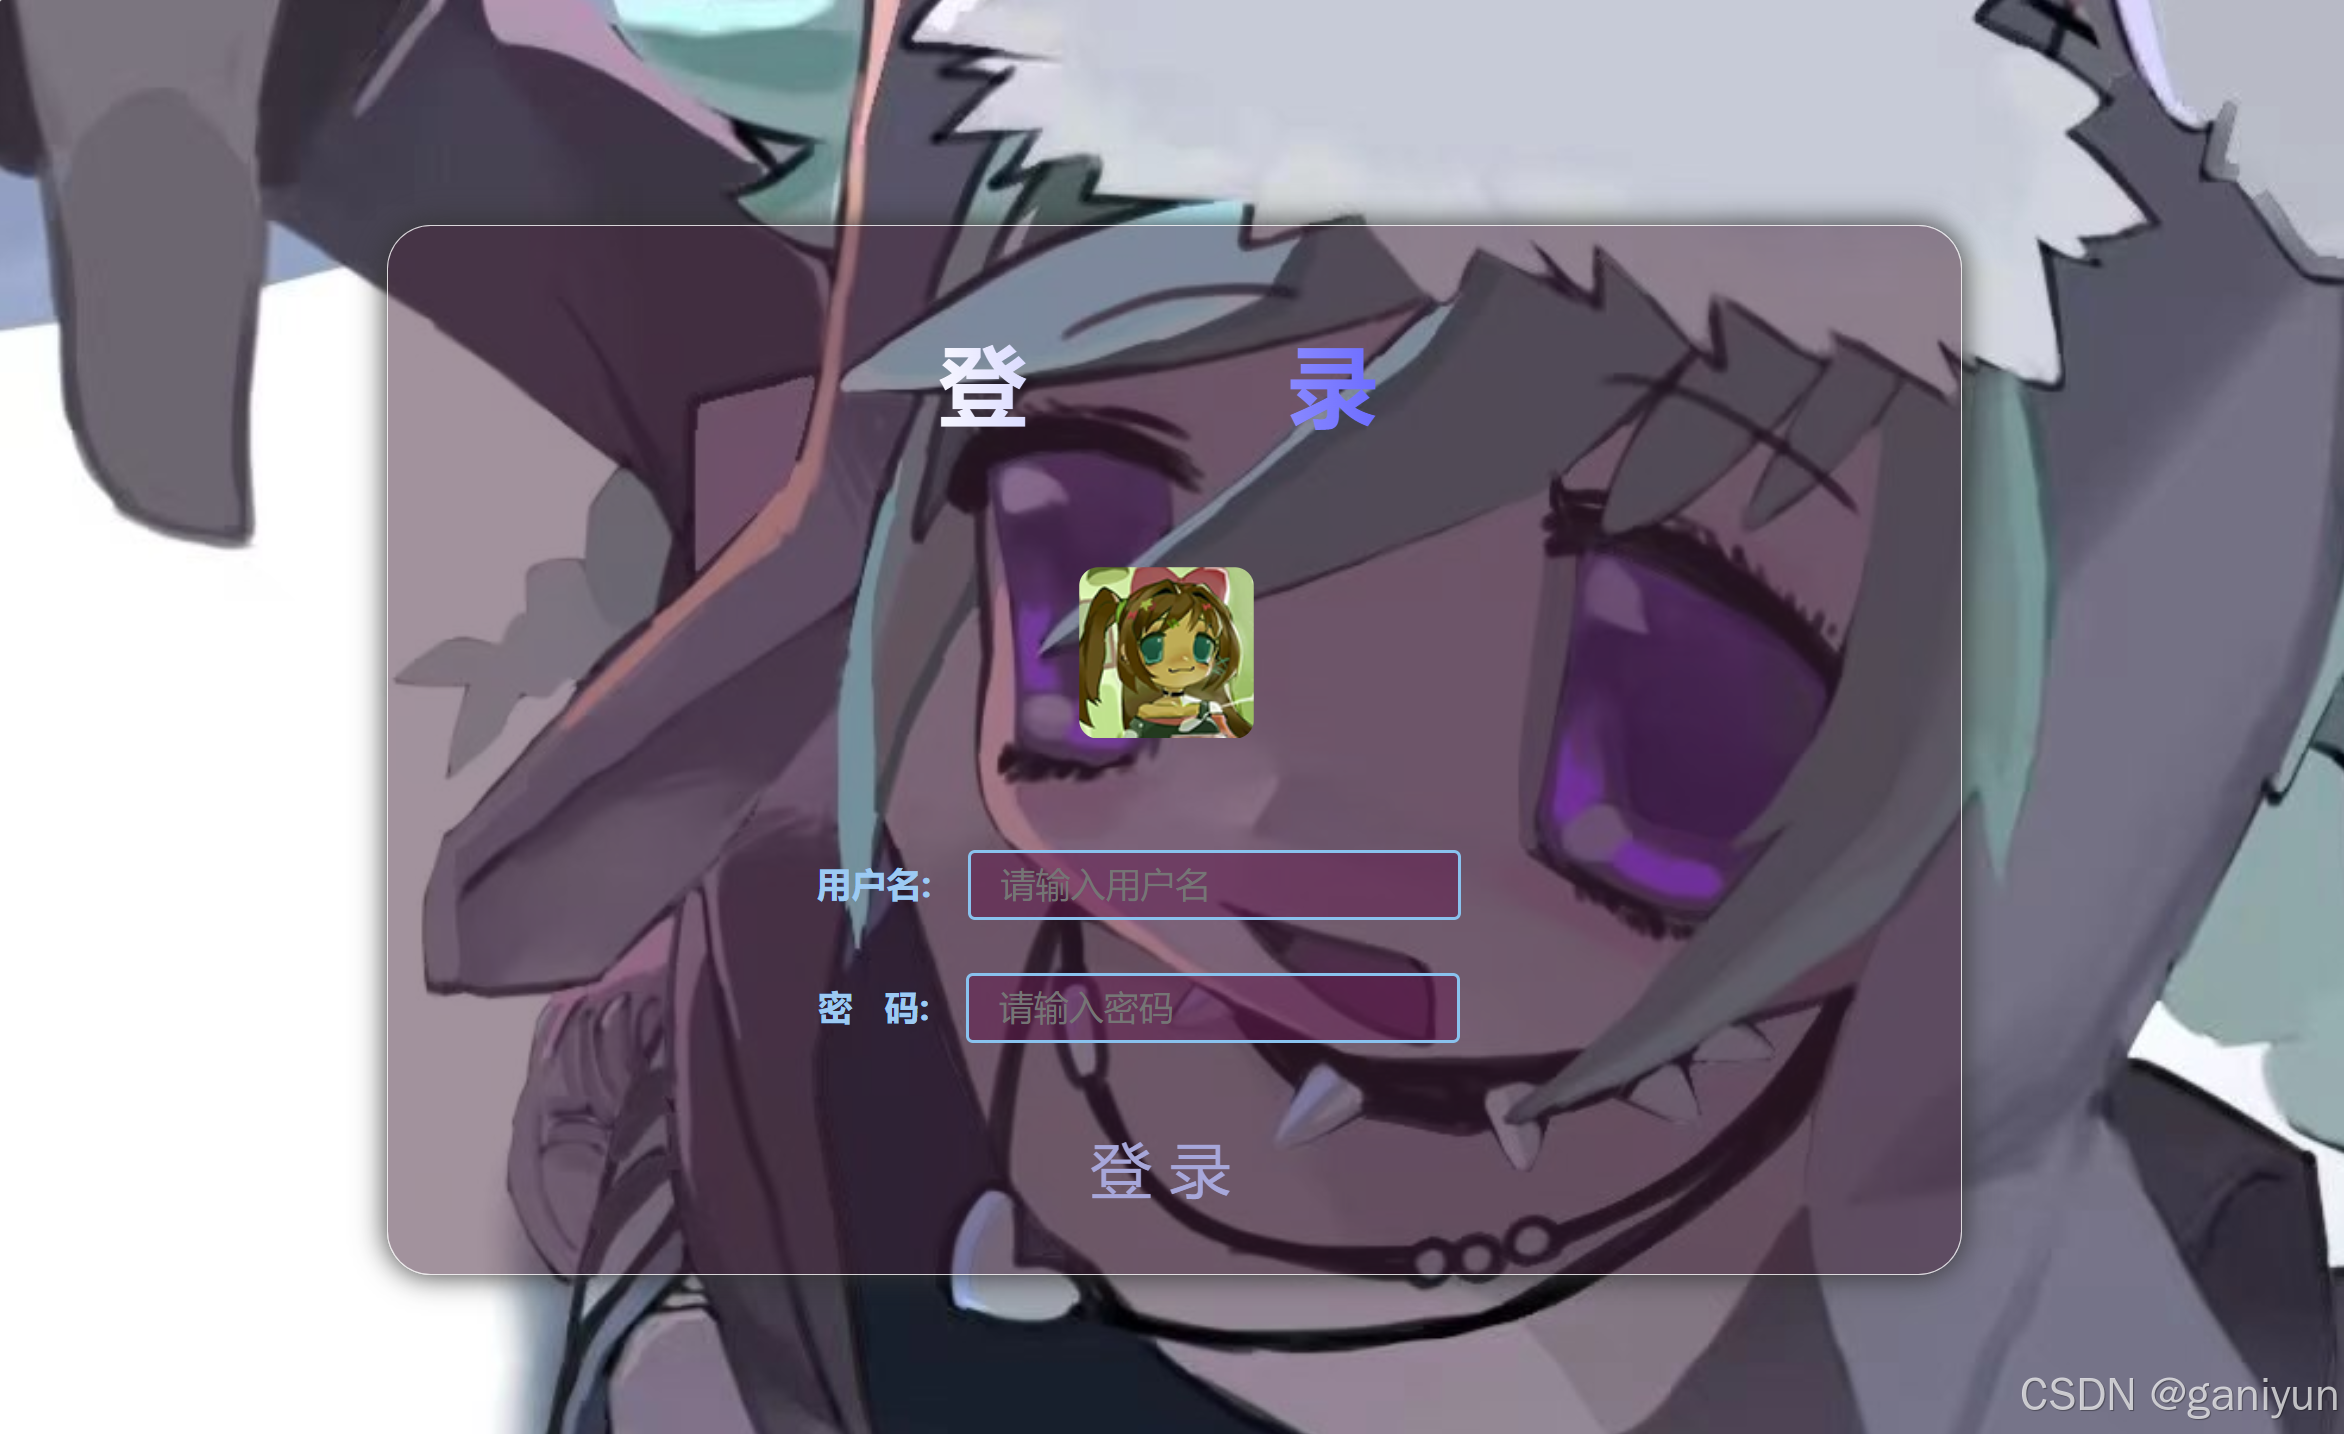
效果如图

1,文件中的图片地址需要更换为自己的图片地址
2,html和css关联需要设置如下代码
<link rel="stylesheet" href="./login.CSS">
3,因为后面还要转跳一个网页,所有要注意在form action中设置该网页的路径,代码如下
<form action="1.html" method="get">
一,和上面的步骤差不多,加了动态背景图和音乐,内容是黑血
这里直接放代码
<!DOCTYPE html>
<html lang="en">
<head>
    <meta charset="UTF-8">
    <meta name="viewport" content="width=device-width, initial-scale=1.0">
    <link rel="stylesheet" href="./1.css">
    <title>Document</title>
</head>
<body>
    <form action="">
        <div class="music">
        <audio src="./黑血2.mp3" controls autoplay loop></audio>
        </div>
        <div class="a">
            <h1>转生入《黑暗血时代》之基础面板选择</h1>
            <hr>
            <div class="name">
            <strong>输入昵称:</strong>
            <input type="text" placeholder="请输入你喜欢的昵称" required>
            </div>
            <br>
            <strong>性别:</strong>
            <span class="gander">
             <label><input type="radio" name="gander" checked>女</label>
             <label><input type="radio" name="gander">男</label>
            </span>
            <br>
            <br>
            <div class="option">
                <strong>选择种族:</strong>
                <select >
                    <option >细高人</option>
                    <option >卓尔人</option>
                    <option >黄星人</option>
                    <option selected>地球人</option>
                    <option >地底小人</option>
                    <option >姨族人</option>
                    <option >退化人</option>
                </select>
            </div>
            <div class="jieshao">
                <ul>
                    <h2>修炼体系</h2>
                    <li>一元天:储元体<br>
                        <strong>修炼方式</strong>
                        <div>不断重复吸收释放元气来淬炼身体,积累到九九八十一次后,身体细胞及各单元将被推至储元体的巅峰。</div>
                    </li>
                    <br>
                    <li>二元天:融元体<br>
                        <strong>修炼方式</strong>
                        <div>随着修炼进度的提升,元气将会渐渐与身体融合,直到完成五层融元体修炼,达到二元天巅峰。</div>
                    </li>
                    <br>
                    <li>三元天:纯元体<br>
                        <strong>修炼方式</strong>
                        <div>分底层、中层、上层三大层次。随着元气修炼的进行,会缓缓将本体一步步改造成纯元体,最终到达三元天巅峰。非常稳定平和。</div>
                    </li>
                    <br>
                    <li>四元天:本源体<br>
                        <strong>修炼方式</strong>
                        <div>四元天修炼的是自身源体,纯净的本体元气在这个过程中会渐渐地形成本源元气,同时身体也会渐渐改造为本源源体。直到修炼完成五层,达到四元天巅峰。</div>
                    </li>
                    <br>
                    <li>五元天:命源体<br>
                        <strong>修炼方式</strong>
                        <div>修炼命源,层次未知。命源体修炼完成后达到五元天巅峰。</div>
                    </li>
                    <br>
                    <li>六元天:合源体<br>
                        <strong>修炼方式</strong>
                        <div>将本源体与命源体融合渐渐形成完整的合源体,最终达到六元天巅峰。</div>
                    </li>
                    <br>
                    <li>七元天:一阶形态源门<br>
                        <strong>修炼方式</strong>
                        <div>不明</div>
                    </li>
                    <br>
                    <li>八元天:二阶形态源门<br>
                        <strong>修炼方式</strong>
                        <div>不明</div>
                    </li>
                    <li>九元天:巅峰源门
                        <br>
                        <strong>修炼方式</strong>
                        <div>不明</div>
                    </li>
                    <li>灵</li>
                </ul>
            </div>
            <div class="gongfa">
                <h2>修炼方向:</h2><br>
                <br>
               <label ><input type="radio" name="q">练元</label>
               <label ><input type="radio" name="q">炼体</label>
            </div>
            <br>
            <div class="duoxuan">
                <strong>使用武器:</strong>
                <input type="checkbox">千辟剑
                <input type="checkbox">零维
                <input type="checkbox">种子(意识原体)
                <input type="checkbox">黑气漩涡
                <input type="checkbox">黑气
                <input type="checkbox">物子碎片
                <input type="checkbox">立方体
                <input type="checkbox">灵封/假灵
                <input type="checkbox">巨人的眼泪
                <input type="checkbox">水晶头骨
                <input type="checkbox">九章图箓
                <input type="checkbox">第七钉
                <input type="checkbox">古书
            </div>
            <br>
            <br>

            <div class="lianxi">
                <strong>您最喜欢书中哪几个桥段,欢迎讨论</strong>
                <br>
                <br>
                <textarea placeholder="在此框填写您的感想"></textarea>
            </div>
            <br>
            <br>
            <div class="add">
                <strong>加入我们</strong>
                <br>
                <br>
                <div>
                    <button type="submit">获取联系方式</button>
                </div>
            </div>
        </div>
    </form>
</body>
</html>
.a {
    text-align: center;/*文字居中对齐*/
    padding: 20px;
    box-sizing: border-box;
    color: rgb(247, 247, 247);
}
.name input{
   width: 200px;
   height: 50px;
   border-radius: 10px ;
   background-color:rgba(114, 114, 155, 0.6);
   border: 0;/*去掉边框*/
   font-size: 18px;
   color: antiquewhite;
}
input:hover{
    transform: scale(0.9);
}
.jieshao{
    display: flex;
    justify-content: center;
    text-align: left;
    margin-bottom: 0;
}
.jieshao h2{
    text-align: center;
}
.gongfa{
   margin: 0;
}
body{
    background-image: url(./R-C.gif);
    background-repeat: no-repeat;
    background-size: cover;
    background-position: auto;
}
.option{
    font-size: 18px;
}
.option select{
    width: 100px;
    height: 30px;
    background: linear-gradient(90deg,rgba(201, 108, 247, 0.35),rgba(18, 18, 234, 0.5));/*渐变背景*/
    color: rgb(45, 155, 250);
}
.lianxi{
    font-size: 20px;
    letter-spacing: 2px;
}
.lianxi textarea{
    width: 500px;
    height: 200px;
    background-color: rgba(0, 0,0, 0.8);
    border-radius: 10px;
    font-size: 20px;
    color: aliceblue;
}
.lianxi textarea:hover{
    transform: scale(1.05);/*鼠标悬停后文本框发达1.05倍*/
}
.add{
    font-size: 30px;
    letter-spacing: 2px;
}
.add button{
    width: 200px;
    height: 50px;
    font-size: 25px;
    background: none;
    border: 0;
    color: #f5ecec;
    overflow: hidden;
}

.add button:hover{
    border: 0;
    transform: scale(1.1);
}
.a button::after,
button::before{
    content: "";
    display: block;/*设置为块元素,独占一行*/
    width: 0%;
    height: 5px;
    background-color: rgba(97, 36, 240, 0.8);
    transition: 0.4s;
}
.a button::before{
    margin-left: auto;/*上伪元素左侧随宽度自适应*/
}
.a button:hover::after,button:hover::before{
    width: 100%;
}
.music{
    background-color: rgba(0,0,0, 0.8);
}
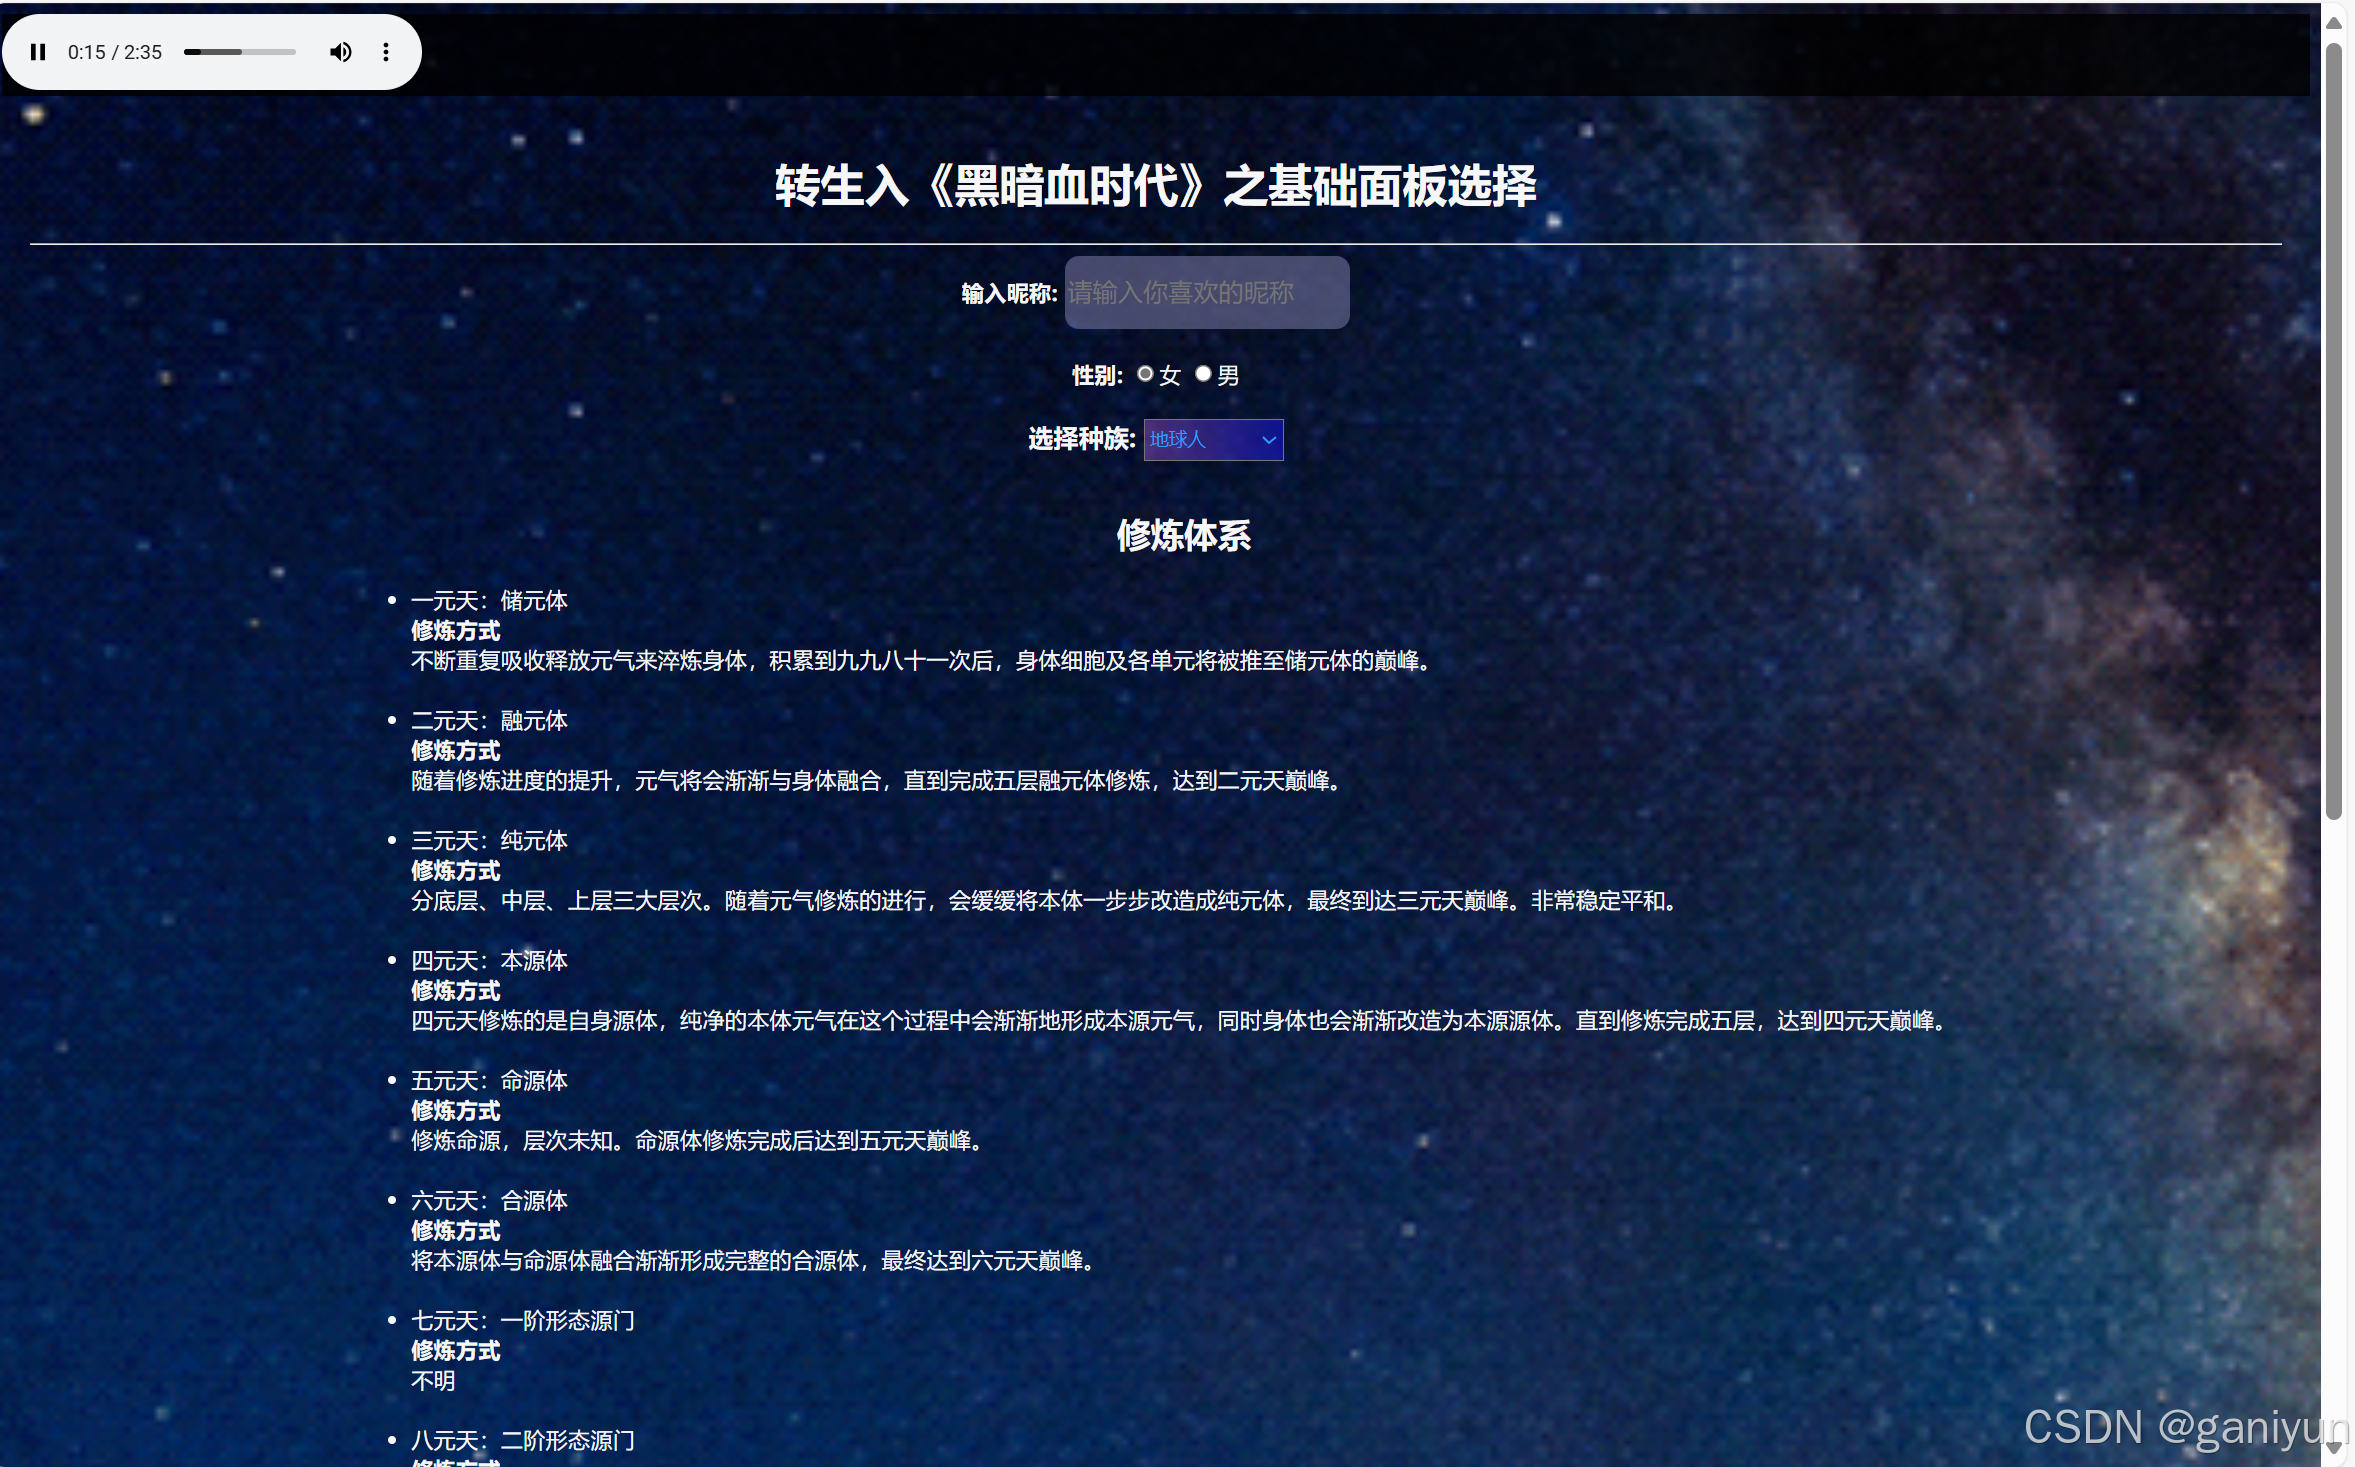
效果如图

总结
1,所有图片和音乐链接都需要自己更换
2,这些代码只是参考,建议打完一遍,自己设计一个
提示:请勿发布广告垃圾评论,否则封号处理!!